Using the Outlook Add-In
- When you compose a message in Microsoft Outlook, you use the Attach drop-down button to attach content in a variety of ways, including:
- Browse and select files and folders stored in Synced Tool, or
- Browse and select a local file stored on your machine.
- Convert an item to a share link, which is particularly useful when forwarding email messages that originally included a standard attachment. You can decide to manually convert these items using the Attach drop-down menu, or this will happen automatically, depending on your attachment polices.
- Note: When you send local files, or convert an item to a share link, they are then stored as Synced Tool content in your Shared Items folder.
How to Install the Outlook Add-In
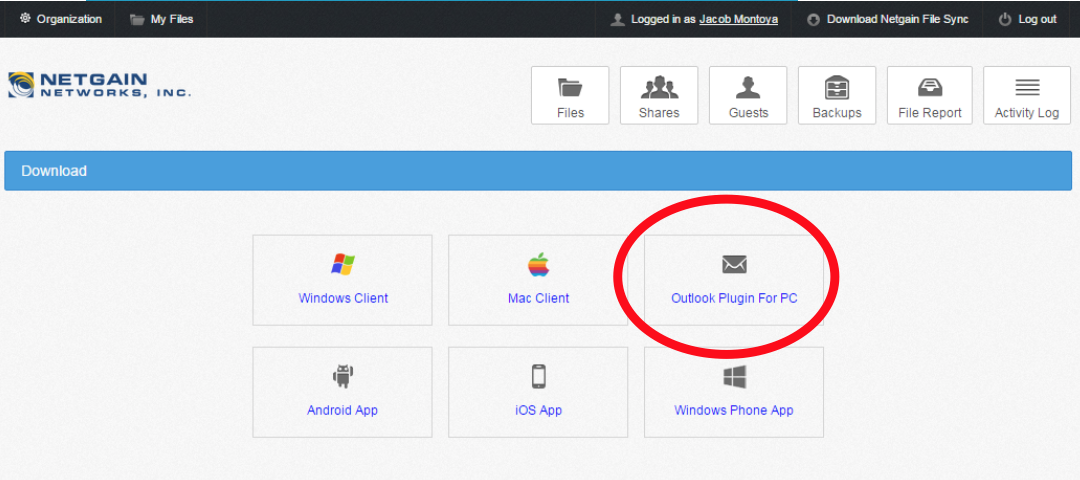
- Log on to https://myfiles.netgainapps.com
- Then Click on Download Netgain File Sync
 3. Next on the Download screen click on the Outlook Plugin For PC
4. The file will start to download, or you will be prompted to save the file, depending on your browser type.
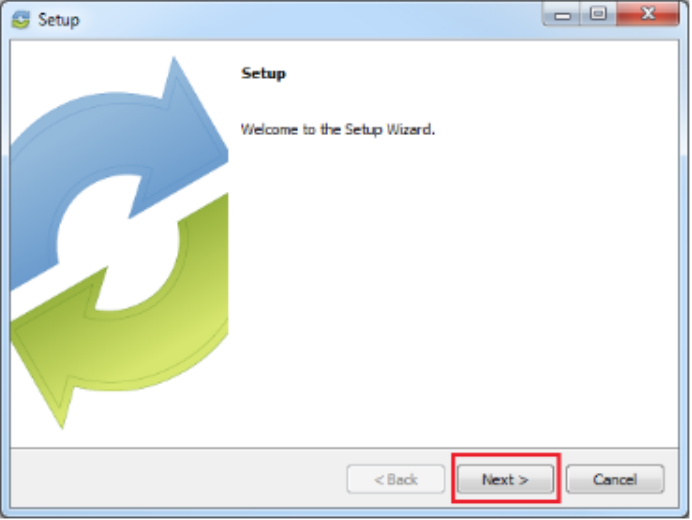
5. When the file finishes downloading, make sure Microsoft Outlook is closed, and click the installation file. The Setup Wizard opens.
6. Click the Next button to start the Setup Wizard.
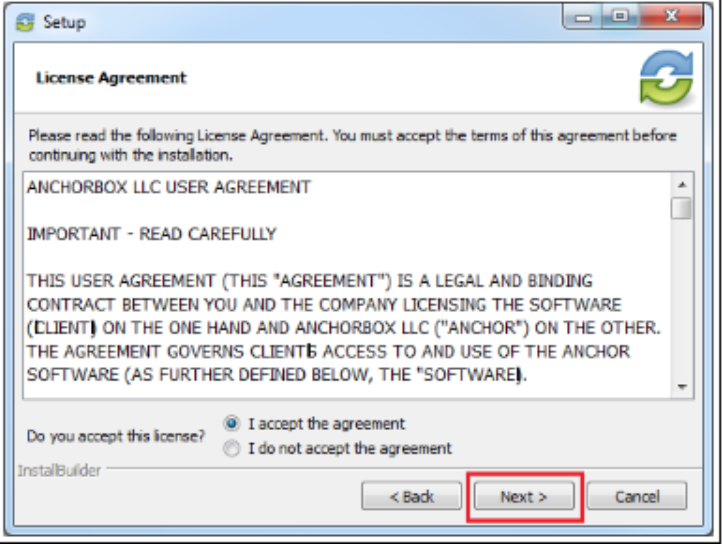
7. In the License Agreement screen, click the I accept the agreement radio button if you accept the license. Then, click the Next button to continue.
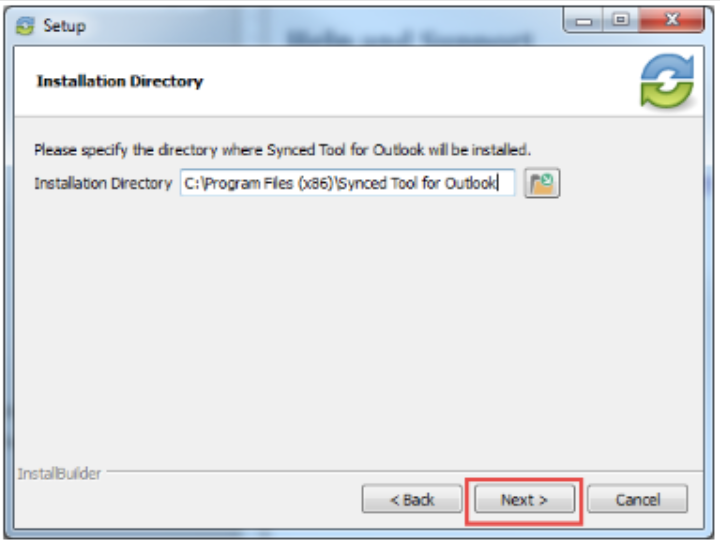
8. In the Installation Directory screen, select the location where you want the installation files to reside on your local machine. In most instances, you can accept the default location. Click the Next button to continue.
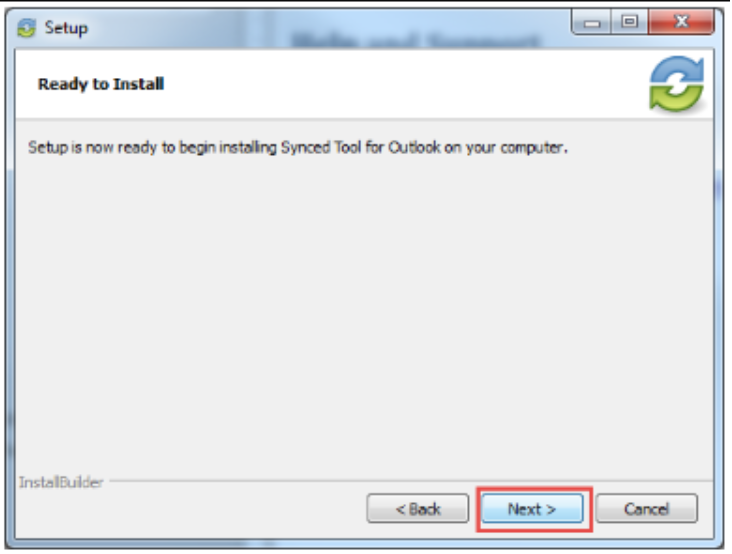
9. In the Ready to Install screen, click the Next button to begin the installation process.
10. When the Setup Wizard completes, click the Finish button.
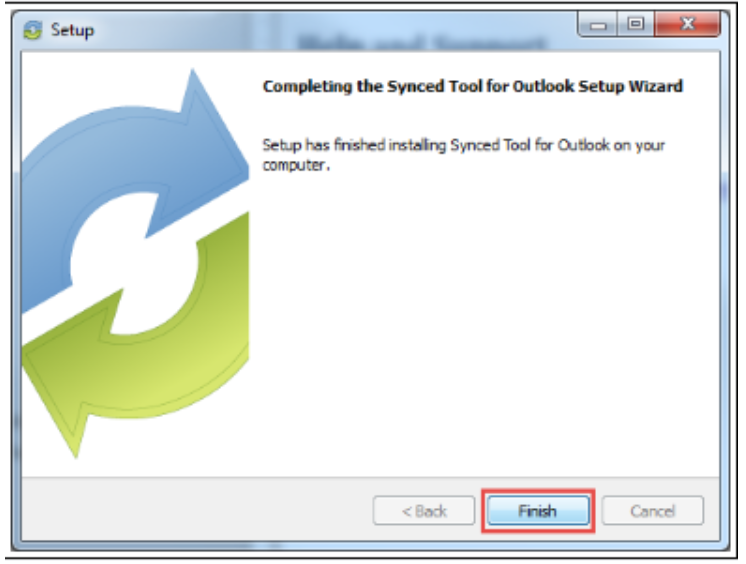
11. In some instances, you might need to restart your MS Outlook application.
How to Configure the Outlook Add-In
After you install the Outlook add-in, you can configure default share settings and attachment policies.
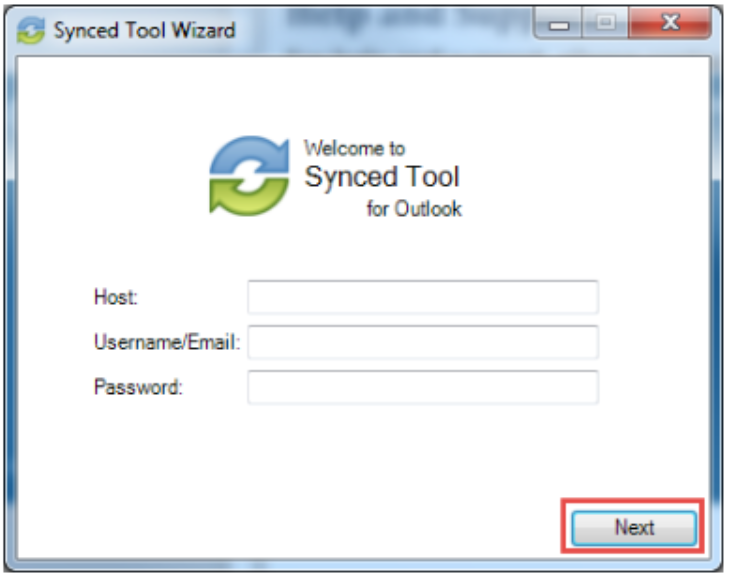
- When you launch Microsoft Outlook for the first time after installing the Outlook add-in, the Wizard displays, prompting you for login credentials.
a. If prompted, enter the organization host name in the Host field (for example, syncedtool.com/)
b. Note: In most instances, this field will be pre-populated with the appropriate host name.
c. In the Username field, enter the same username that you use to access the web portal
d. In the Password field, enter the same password that you use to access the web portal.
e. Click the Next button when you are finished.
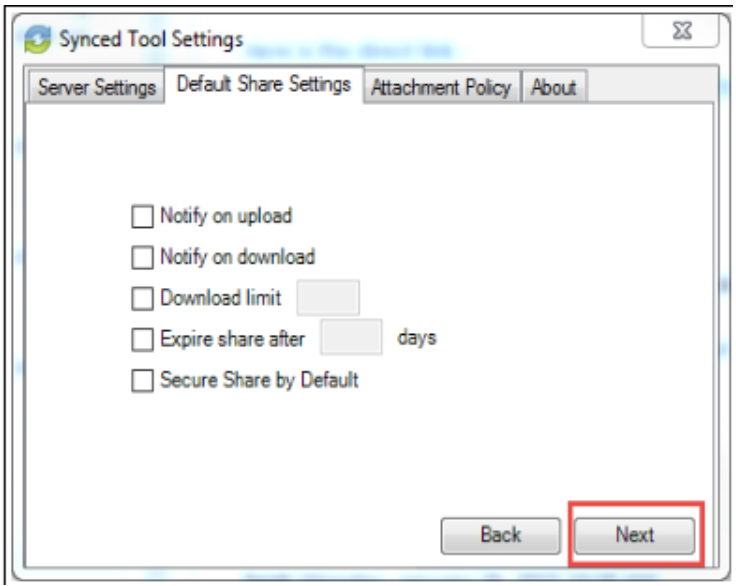
2. In the Choose your Default Share Settings screen, set default settings for how you share links.
a. Click the Notify on upload checkbox to receive notifications when a file is uploaded to a shared folder.
b. Click the Notify on download checkbox to send notifications when the share is downloaded.
c. Click the Download limit checkbox, and enter a download limit number, to limit the number of times the share is downloaded by each recipient.
d. Click the Expire share after checkbox, and enter a number of days, to set a share to expire after the specified number of days.
e. Click the Secure Share by Default checkbox to send all content as secure shares. If this option is selected, all recipients will be required to log in to access the shared content. A recipient who is not a member of your organization will be added as a guest user; a guest account will be created for the recipient, and login credentials will be provided.
i. Note: If the Force New Share Links to Require Login policy is enabled for your organization, this feature is turned on by default, and is not configurable by end users.
f. Click the Next button to continue.
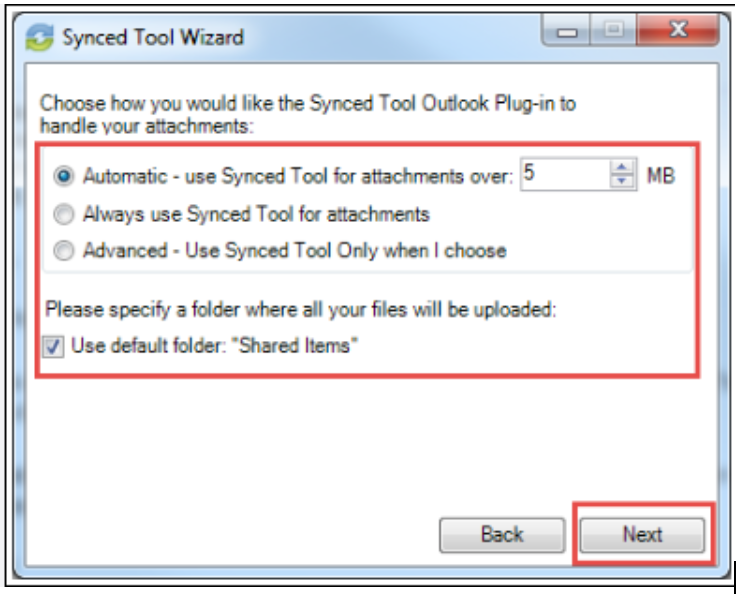
3. In the next screen, set default attachment policies.
a. Click the Automatic radio button to automatically use the Outlook add-in for attachments over a certain size, even when an email draft already includes a standard attachment (for example, when forwarding messages). The add-in will automatically convert these attachments to share links, and store these items in your Shared Items folder.
b. Click the Always use for attachments radio button to automatically use the Outlook add-in for all attachments, even when an email draft already includes a standard attachment. The add-in will automatically convert all attachments to share links, and store these items in your Shared Items folder.
c. Click the Advanced radio button to only use the Outlook add-in when selected.
d. Click the Use default folder checkbox to use the default location for storing shares configured from Outlook. If you uncheck this checkbox, you will be prompted to select another location on your local machine.
e. Click the Next button to continue.
4. When the Wizard completes, click the Finish button

How to Use the Outlook Add-In
To use the Outlook add-in
- In Microsoft Outlook, create a new email message. The ribbon will display an Attach drop-down button.
- Click the Attach drop-down button, and select Send a File.

3. The Account Browser dialog box displays.
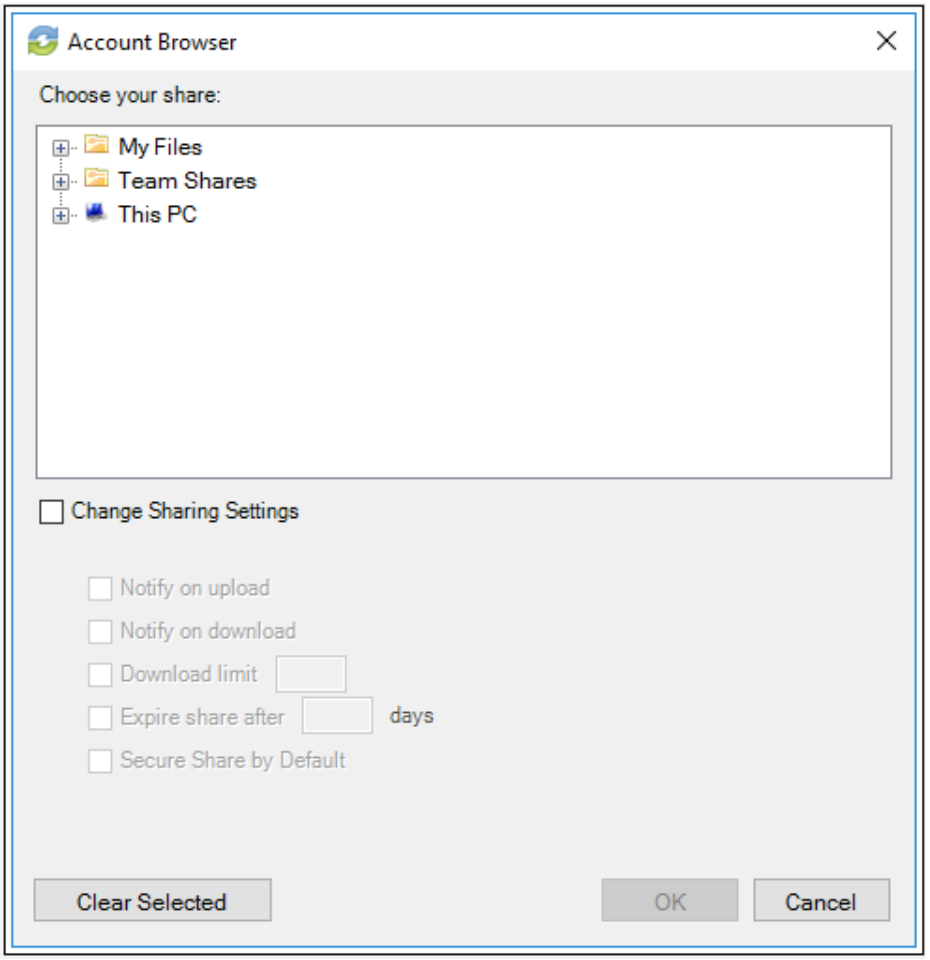
4. In the Account Browser dialog box, select the content you want to share.
a. To attach a file or folder stored in Synced Tool, click to expand the My Files folder, or the Team Shares folder, and select the appropriate content.
b. To send a file from your local machine, click to expand This PC. You can then browse and select a file on your machine.
c. Optionally, you can change your default share settings by clicking the Change Share Settings checkbox.
5. Alternatively, to convert an attached item to a share link, click the Attach drop-down arrow and select Convert to Synced Tool File.

Any attached item will automatically convert to a share link, and will be stored in your Shared Items folder.
6. Click Outlook’s standard Send button to send your email.
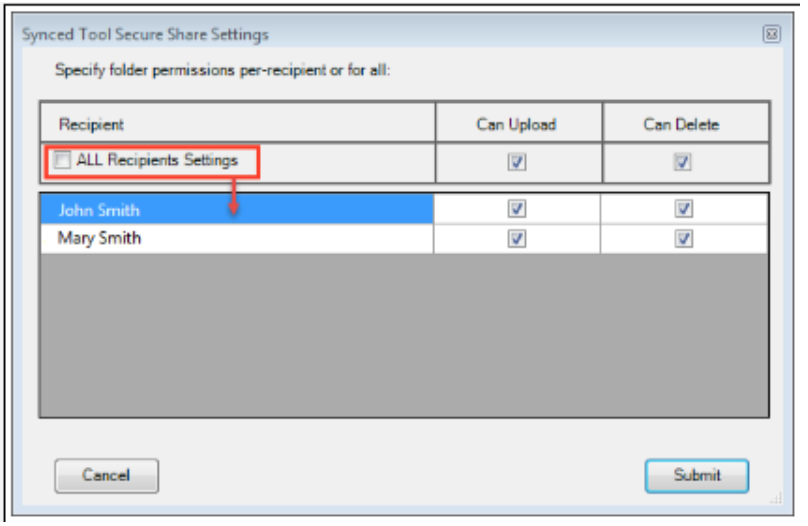
7. If you have selected to send a secure share to an entire folder (rather than a single file), a Secure Share Settings dialog box will display, prompting you to configure permission for each recipient. You can set upload permissions, which allows recipients to upload content into the shared folder, or delete permissions, which allows recipients to delete content in the shared folder.
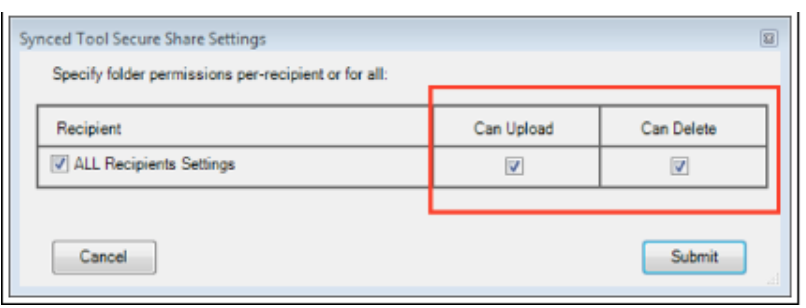
8. Optionally, uncheck the ALL Recipients Settings checkbox if you would like to configure separate permissions for each recipient.