
How to Setup eFAX
Setup a new printer in the control panel.
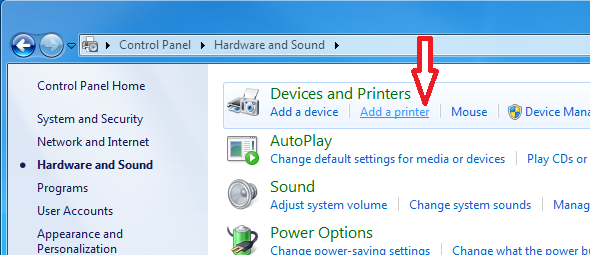
Go to Start –> Control Panel –> Printers and Faxes –> Add Printer.
for Vista, 7, and 8 use
Start –> Control Panel –> Hardware and Sound –> Add Printer
Click Next –> Select option ‘A Network Printer, or printer attached to another computer’ –> ‘Connect to a printer on the internet or on a home or office network’.
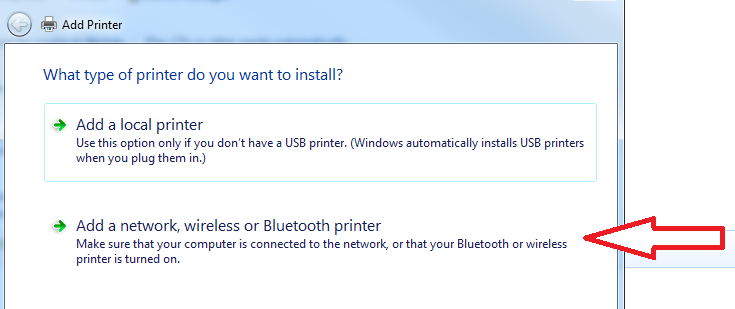
for Vista, 7, and 8 use
Select ‘Add a network, wireless or Bluetooth printer
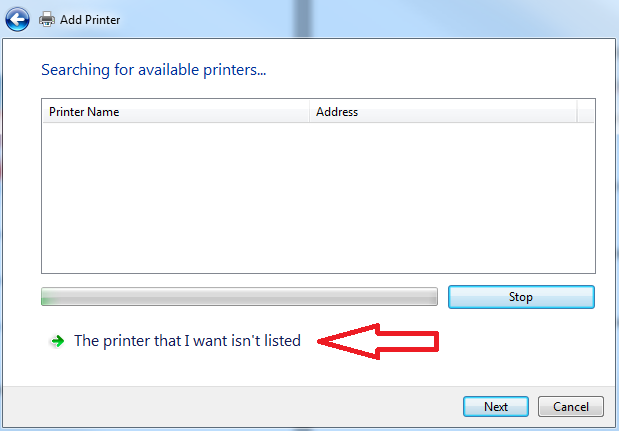
Only for Vista, 7, and 8
Select ‘The printer that I want isn’t listed’
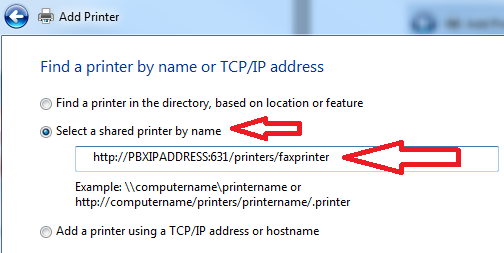
Select ‘Select a shared printer by name’
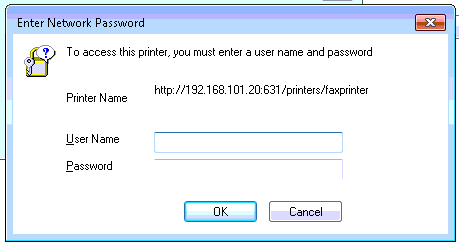
Then enter
https://PBXIPADDRESS:631/printers/faxprinter
NOTE: Replace PBXIPADDRESS with your Switchvox IP address/Hostname
Select ‘Next’ and on the following page choose ‘Use the specified user account’
for Vista, 7, and 8 just enter your username and password
The username will be the user’s Switchvox extension number.
The password will be the extension’s numeric voicemail password.
Then hit ‘Ok’.
Next, you should be prompted to setup the printer drivers.
Use the following:
Make: Generic
Printers: MS Publisher Color Printer
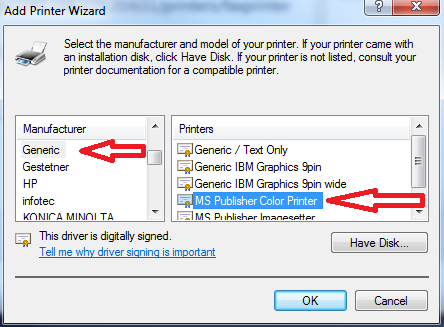
Choose Ok and Finish and you are all setup to print documents from any application to this fax printer.